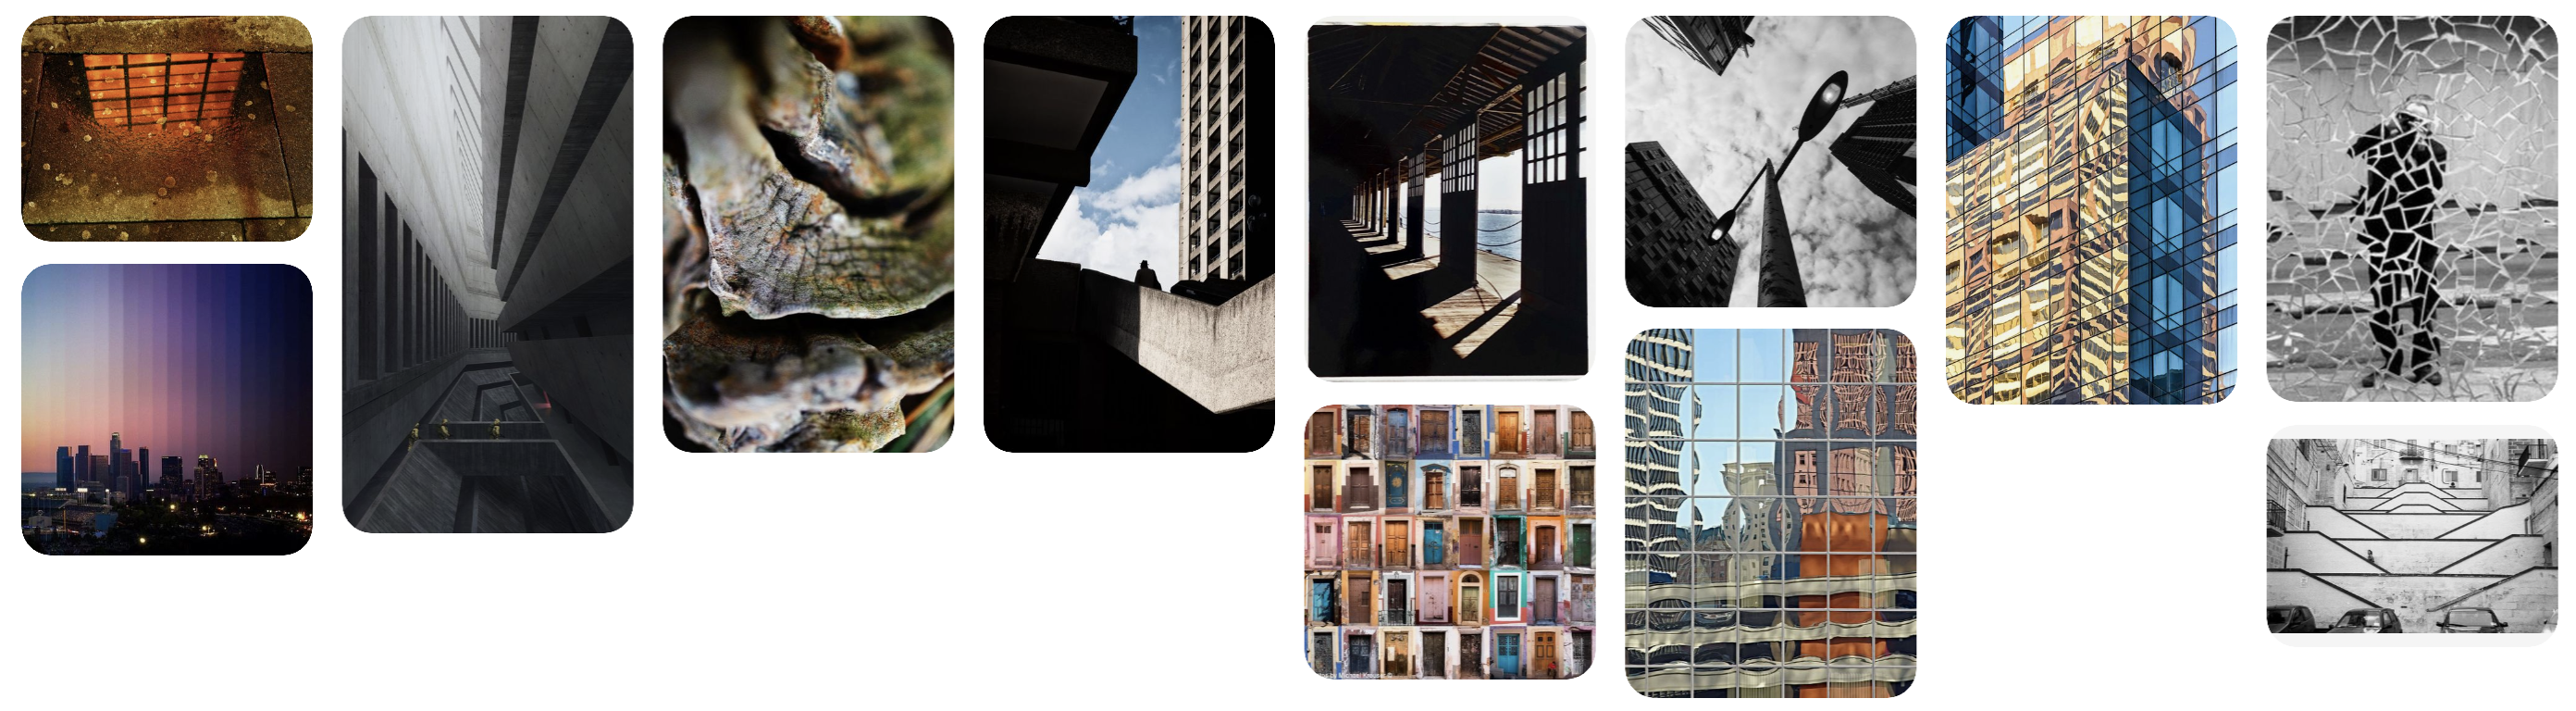
Pintrest Board
Photograms
A photogram is a image made without the use of a camera by placing objects directly onto the surface of a photo-sensitive material such as photographic paper and then exposing it to light. The result of this is a negative shadow image varying in tone, depending on the transparency of the objects used. Areas of the photographic paper that have received no light appear white while other areas that are exposed to light through transparent or semi-transparent objects appear grey.
The Darkroom
|
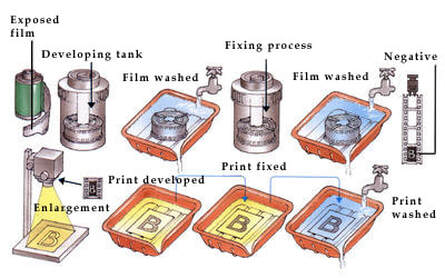
A darkroom is a room used for developing photographs made with photographic paper or film. The darkroom is where white light is shut out and red lights are used instead.
In a darkroom, enlargers are used instead of a camera. This is a projector that shines light down onto the photographic paper turning all the photographic paper that the light has shone upon black and all the photographic paper that has been blocked by objects placed on the paper or other things stays white. The red light (safe light) is essential in a darkroom, as it prevents the photographic paper from being accidentally exposed and ruined. This light is used instead of white light for visibility. Once the paper is exposed by light, it has to go through a series of chemical baths for the image to develop and fix the developed image as it is so isn doesn't ruin once placed back in white light. |

|
Chemical stages in the dark room

These are darkroom trays. The first of tray holds developer. The paper must be left submerged for 1-2 minutes.
The second tray holds the stop chemical. The developed photographic paper only has to be submerged in this tray for 30 seconds because the chemical stops the paper from developing further and does not require as long to complete this step.
The final tray is the fix chemical which stabilises the image, and makes it unaffected by any further exposure to white light. Paper must be left in here for 3-4 minutes.
Lastly, the image is rinsed in a sink filled with tap water to remove any excess chemicals on the paper before it is dried. Separate tongs are used for each tray throughout to move the photographic paper from each tray as it processes, to avoid any contamination between the chemical baths and any damage from handling the paper directly.
First response

|

|

|

|
www: I think my first attempts of ever using the dark room came out very well and you can clearly see my attempt of using a variety of random objects.
ebi: I would have liked to me more creative with my photograms and use a wider variety of objects.
ebi: I would have liked to me more creative with my photograms and use a wider variety of objects.
Painting with developer
Painting with developer is what you place the blank photographic paper under the enlarger and then use a paintbrush dipped in developer to create a design of your choice. Then you dip the photographic paper in stop, fix and water like usual just and just miss out the dipping it in developer.

|

|

www: I wanted to be creative with what I painted on the photograms and I feel like you can tell that through what I have made
ebi: I would have liked to make more with different designs
ebi: I would have liked to make more with different designs
Test strips
Enlarging is the process of placing the photographic paper underneath the enlarger and placing the objects of your choice on top to create your design. Once you have your desired design you get a a piece of card, metal or something that will block the light of the enlarger. Then set the enlargers timer to two seconds and every two seconds you move object that you have chosen to block the light away from the photographic paper until it isn't covering it anymore. Then you continue to do all the steps to create a normal photogram by placing it in the developer, stop, fix and water. Finally you take it out of the dark room you will notice the different levels of colour on the different parts of the ".
First response


www: I think these came out very well because you can clearly see the different levels of exposure to light.
ebi: I would have liked to use different objects to see the effect that they would have while using this technique
ebi: I would have liked to use different objects to see the effect that they would have while using this technique
Sandwich print
Sandwiching is a process of placing two photographic paper together with the already produced photogram on the top and the new photographic paper on the bottom. You place these down with the shiny sides touching. Make sure that both photographic paper are completely flat before you turn the enlarger on. Once you have turned the enlarger on you go through the other steps as usual but only with the new photographic paper as that is the one where you will see the opposite appear.

|

|
www: The effect that I tried to get came out well and you can tell that these two photos are opposites
ebi: I would have liked to use objects that are less transparent and larger objects that make the sandwiching look more random
ebi: I would have liked to use objects that are less transparent and larger objects that make the sandwiching look more random
Weaving
Weaving is the process of taking two sandwiched photographic paper and cutting one of the photographic paper horizontally and the other vertically. After this you weave the strips together to create a pattern. Once you have weaved the strips together you have to carefully turn it over and tape the back of the weave to make sure it doesn't come undone or fall apart.

www: I think the weaving came out very well because you can still see the image through the weave and I got all the length and widths of the strips perfects so everything fits
ebi: I would have liked the negative image to be more visible so you can clearly tell which strip it negative and which strip is positive.
ebi: I would have liked the negative image to be more visible so you can clearly tell which strip it negative and which strip is positive.
Mounting
To complete the mounting process I had to chose my 6 best photograms. Then I have to get a template for the A3 piece of card and cut out 6 holes for each photo. Then I I picked a side of the piece of paper and placed each photogram upside down in a hole and used masking tape to hold each of them in place while checking the other side after each photogram to make sure everything was in place and it was straight.

Pin hole Camera
Ben Nathan
Ben Nathan works across different media, from painting and photography to film and sculpture. His artistic skills reflects on the functionality of the city and its industry and documenting urban change. His explorations into infrastructure and photography questions the changing nature of our cities environment and access to public or private space.


In this task I was required to make a successful pin hole camera and make four successful images:
- A photo from a window looking outwards
- A photo of a corner of a building
- A portrait
- A double exposure image
What is a pinhole camera
A pinhole camera is based off of a camera obscura. A camera obscura is a room or container that lets no light inside, except for a small hole that lets light through. I created my pinhole camera by using a large can with a pinhole in it. When light passes into the pinhole in straight lines, they become horizontally inverted, as the light touches the bottom of the camera and therefore the image appears upside down.
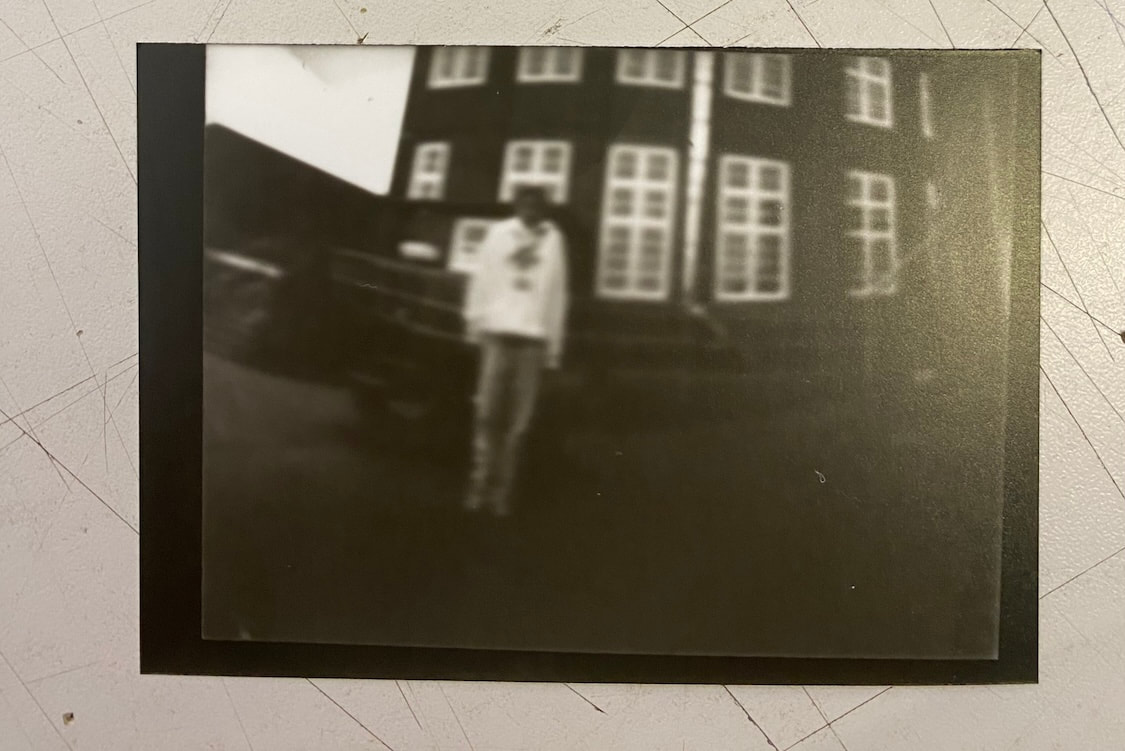
To Complete these photos I had to place a piece of photographic paper in my can and aline it with the whole in my can. I had to walk around my school and have one test piece to understand how long I need to keep the whole open. Then once I understood how long I need to keep the whole open, I walked around my school and took photos of different types of structures and people. Then once I've taken the photo I go back to darkroom and develop the photo.
From a window looking outwards

|

|
A photo of a corner of a building

|

|
A portrait

|
|
A double exposure image

|

|
www: I think the positive and negative of these photos came out very well because you can clearly tell what the subject of photo is and has plenty of detail.
ebi: I would have liked to get different angles of my subjects and create a sense of uniqueness.
ebi: I would have liked to get different angles of my subjects and create a sense of uniqueness.
Film Camera
|
SLR Camera
A pinhole camera is the most basic form of camera allowing light to enter through a single hole and hit light-sensitive paper. The same is true for a manual SLR camera, except the light has to pass through a lens, which sharpens the image and controls the intensity of light through a control known as the 'aperture'. The light is allowed to hit the film for a period of time, which is controlled by a shutter. |

|
Aperture
The aperture determines how much light is exposed in the shot. The lower numbers equal more light exposure therefore meaning that the higher the number the less light let in.
Shutter speed
The shutter speed setting determines how fast camera shutter opens and closes when taking a photo. Long shutter speeds open the shutter for more time, letting in more exposure and light.
Film
Photographic film is made up of a plastic that is coated in light sensitive chemicals. The sensitivity of the film is measured in using a unit called ISO
- ISO 25-100 : Slow Film (Low sensitivity)
Benefits: fine grain, excellent quality
Disadvantages: needs strong light source - ISO 200-400 : Medium Film (Mid sensitivity)
Benefits: good quality all round film
Disadvantages: can be too slow in low light
- ISO 800-1600+ : Fast Film (High sensitivity)
Benefits: good in low light/dark settings; no need for using flash
Disadvantages: grainy quality

My first film - Intentions for the task
In this task I was required to learn how to use an SLR camera and how to value each and every image because you don't have the option to delete it and try again like you do with a digital camera. When learning how to use SLR camera it felt like starting from the beginning because I had to re-learn when every button did and how to use the camera from scratch. For my first photograms I began with an aperture of 1.4 and slowly made my way up with each photo. After that I changed the shutter speed from 125 milliseconds to 1 second to 2 and then 4 seconds. I did this as a tester to understand what kind of light needs a certain type of aperture and what movements need a certain type of shutter speed.
In this task I was required to learn how to use an SLR camera and how to value each and every image because you don't have the option to delete it and try again like you do with a digital camera. When learning how to use SLR camera it felt like starting from the beginning because I had to re-learn when every button did and how to use the camera from scratch. For my first photograms I began with an aperture of 1.4 and slowly made my way up with each photo. After that I changed the shutter speed from 125 milliseconds to 1 second to 2 and then 4 seconds. I did this as a tester to understand what kind of light needs a certain type of aperture and what movements need a certain type of shutter speed.
Developing My film
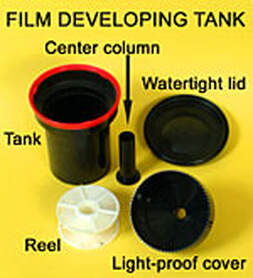
To develop my film I took the film into the dark room however film compared to photography paper reacts to all light including red light, therefore the first couple of steps have to be completed in complete darkness. Firstly in complete darkness the film has to be removed from the canister and the tip that isn't completely square has to be cut off using scissors. After that the film has to be placed into the gates of the reel and slowly spun until all the film is inside. Then the reel is placed inside tank with the centre column going straight through the reel to hold it in place. Once that is complete you place the light proof cover on top of the tank and twist it till you hear a click to make sure its locked in place and ensuring that when you take it outside the film wont continue to develop.
Next the film has to be placed in chemicals so it can develop. I mixed 300 ml of developer with an equal amount of water in a measuring jug, and removed the water tight lid from my tank. This mixture is then poured this through a funnel and through the light proof cover into the tank. The developer then takes 7 minutes to work, and I had to agitate it every 30 seconds by flipping the tank upside down, so that the chemicals could wash over my film. Next, the developer was drained from the tank, and the stop chemical is poured in. This chemical was the same amount as the developer. I then had to agitate this for 30 seconds in the tank. The final chemical we had to use was the fixer. Once the stop chemical was drained, the fix was added and agitated for another 5 minutes. Lastly, the fix is drained from the tank, and the tank is left under a tap so that it can fill with water to rinse off any excess. Lastly, once the film is rinsed, it can be unrolled and hung out vertically to dry in the drying cupboard. Once dry, I cut my film into strips of 6 images, and slotted them into a neg holder so I could then make my contact sheet.
|
|
Contact Sheet

Enlarging My Film

|

|

www: Im happy with how I've enlarged these photos and pleased that I got plenty of detail throughout all three. Especially with the top right because the whole photo is in focus and therefore shows all the detail in his clothes to the plants behind him.
ebi: I would have liked to have taken more photos in different locations and therefore be able to develop more photos with a variety of textures.
ebi: I would have liked to have taken more photos in different locations and therefore be able to develop more photos with a variety of textures.
